I decided to document somehow my little projects I commit sometimes, if not only for my own reference, but also for others to try them too! So this blog has been born and this is my first post. It is about creating a little, always on home NAS (network attached storage) server. If you would like to try it yourself, please read it in full first and make sure everything is clear.
I have chosen a HP T5540 thin client for that purpose as I got it pretty cheap off ebay. It is quite versatile little PC machine (it is fanless and takes about 15 Watts of power with hard drive inside!). It has 1GHz Eden cpu and is fitted with 512MB of RAM memory and 128MB flash storage. You can get some more information about it from parkytowers.me.uk site. I just love this site in terms of re-purposing old thin client PC’s. As you can see on David’s website, this particular thin client have traces for SATA connection on the board, which after some work, can be used to connect additional SATA hard drive.
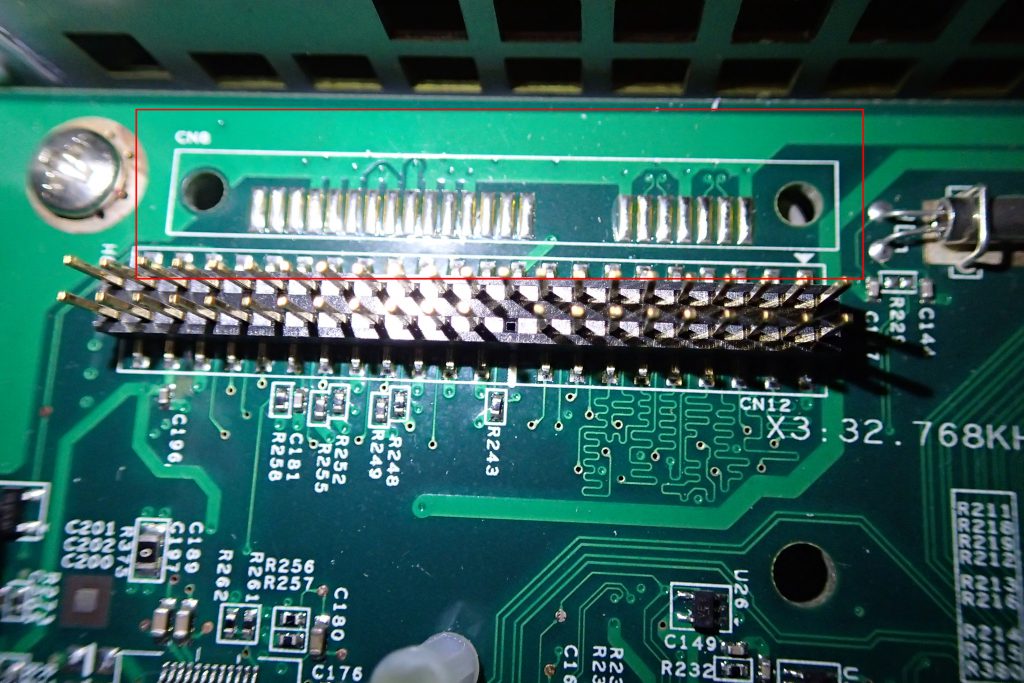
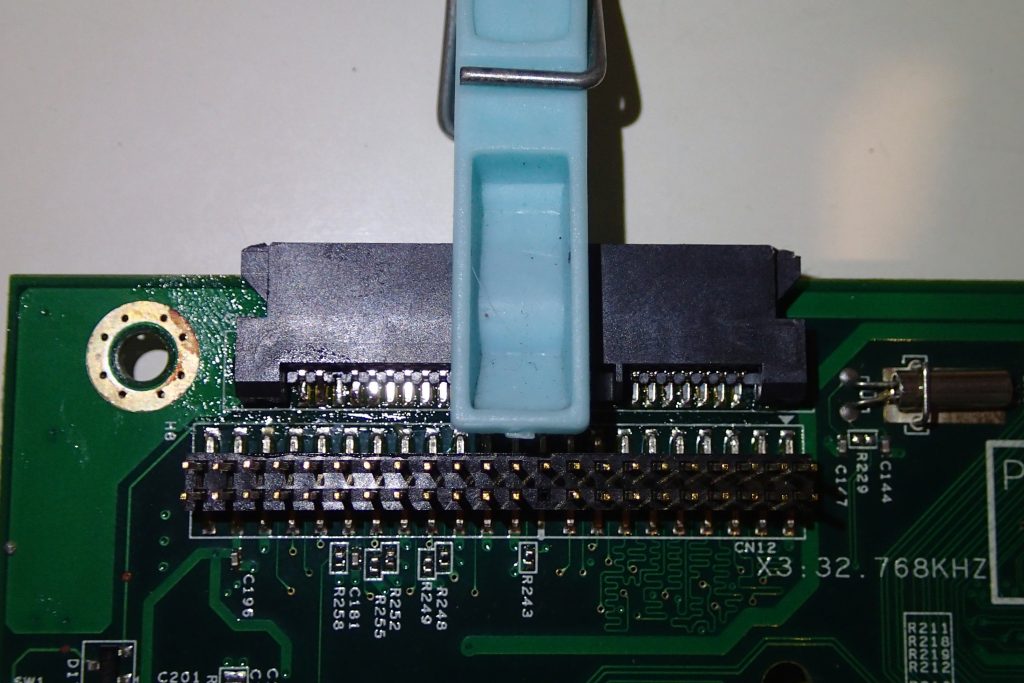
I started from opening the machine and had a look inside. On the upper left corner of the board – close to the PATA flash memory, there actually are expected SATA traces. Based on a picture published on David’s website I previously ordered a SATA socket which should be compatible with it.
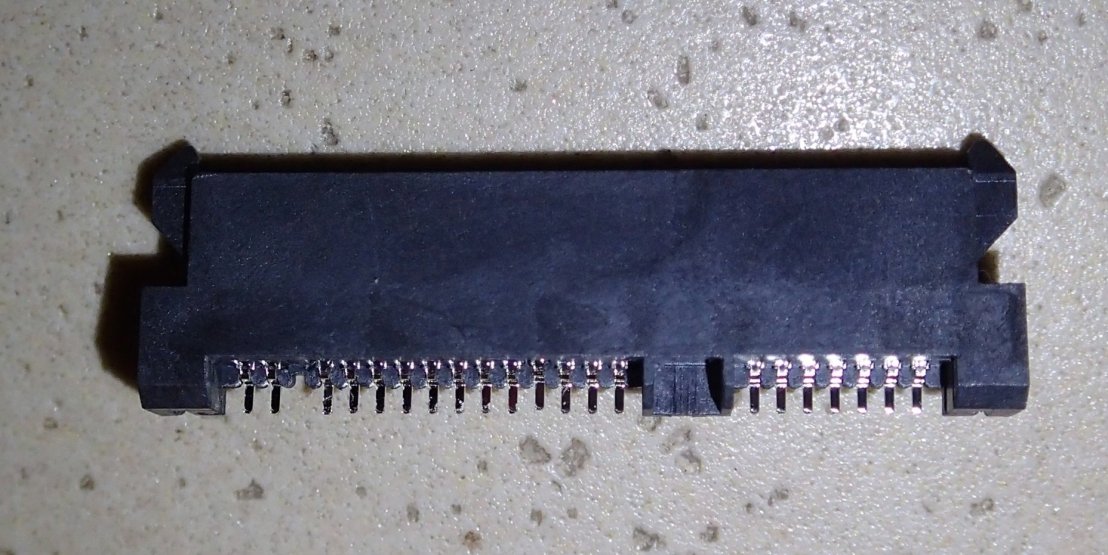
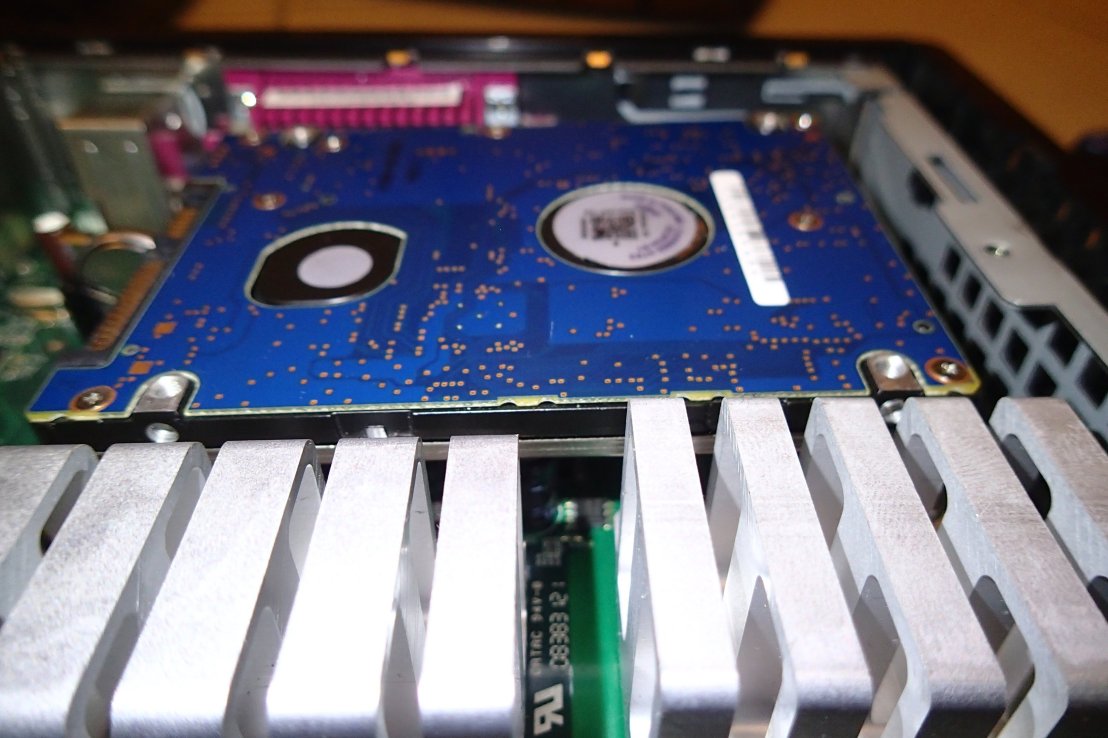
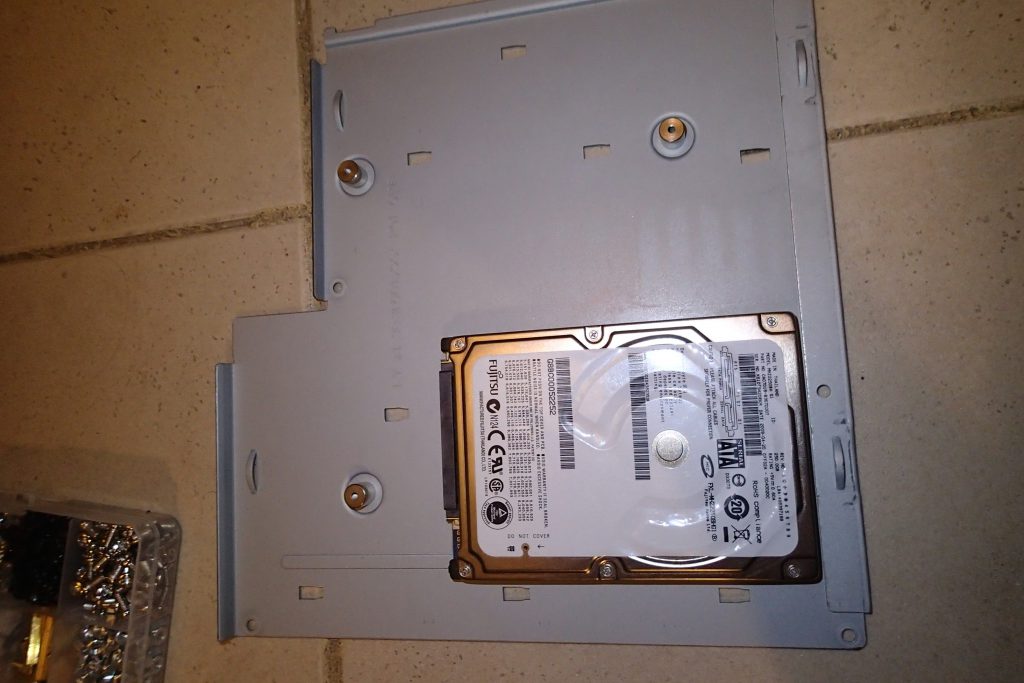
It can be seen, that the connector is missing one pin – I took it out as I needed it for another fix, but in here it is not needed. It is one of the pins providing 12V to SATA device. The board does not provide 12V on the connector, we will not need it as we are going to use small laptop hard drive for our NAS storage. Saying that here goes the photo proving the drive will fit inside the thin client.
Ok. Lets start from taking the mainboard out of the enclosure. There are five screws securing it to the bottom of the box and there also are four screws securing the heatsink. To take out the heatsink we should unscrew all four screws while holding it securely in place, as we do not want to damage the chip underneath. When we get all the screws out, the board should just slide out towards the back.

We now have the whole mainboard out of the enclosure. I also removed memory and flash. Now it is time for soldering the connector to the board. Although the solder points are quite small, it should not be very difficult to solder. First with small brush I put some small amount of soldering paste on both mainboard and connector. Next just use the soldering iron to tin all the connectors with solder. It should be sufficient to tin only the mainboard side, but I did both.


Next we need to put them together. I use a peg to hold the connector to the board in required place.
When it is aligned properly we just use soldering iron to heat each pin for about 3-5 seconds for the solder which is already there to melt and make the bond. I do the edges first and then the middle of the connector, so there is less chance to move it during soldering. Here is a photo of finished soldering.
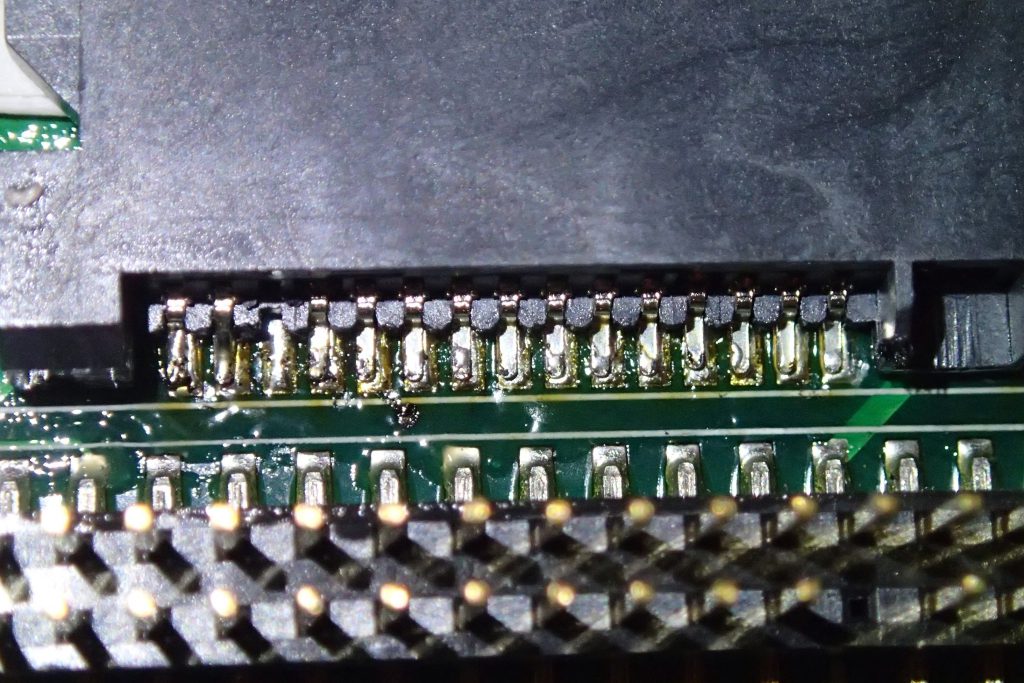
You can see, that I used a little bit too much solder, but the bond should be OK. After checking the connection if there is no bridges between pins and when we are happy with our soldering we should clean the excess of soldering paste (nail varnish remover should do the job).
As the SATA port will be very close to the metal enclosure, the latter has to be cut out! I used tin snips and a file to take a bit out.


Now we can put our motherboard back into enclosure.


We need to secure our hard drive inside, so I decided to fix it to the metal enclosure cover. It is crucial at this point to get the measurements right as there is not much space inside and it will be quite tight fit. To get the template for drive screw holes I wrapped the drive in a piece of paper and pinched the screw holes gently with a screwdriver. I also marked drive edges with smearing a bit of pencil on the edges. As we will be fixing our drive to metal I used a thin sheet of plastic (butter spread lid) for isolating the drive from the enclosure. Again, the measurements for drilling must be accurate! I just put the drive inside and measured the distance from the screw holes to the edges of the metal lid (two screwholes is enough as we will use template).
There is one more thing in our way – the metal screw fixing which sticks out inside. I removed it just drilling it out with bigger drill bit.


This is how the drive looks like, when it is fixed to the metal lid. There is that olive spread lid layer in between the drive and metal.
All fits nicely after putting it all back together!
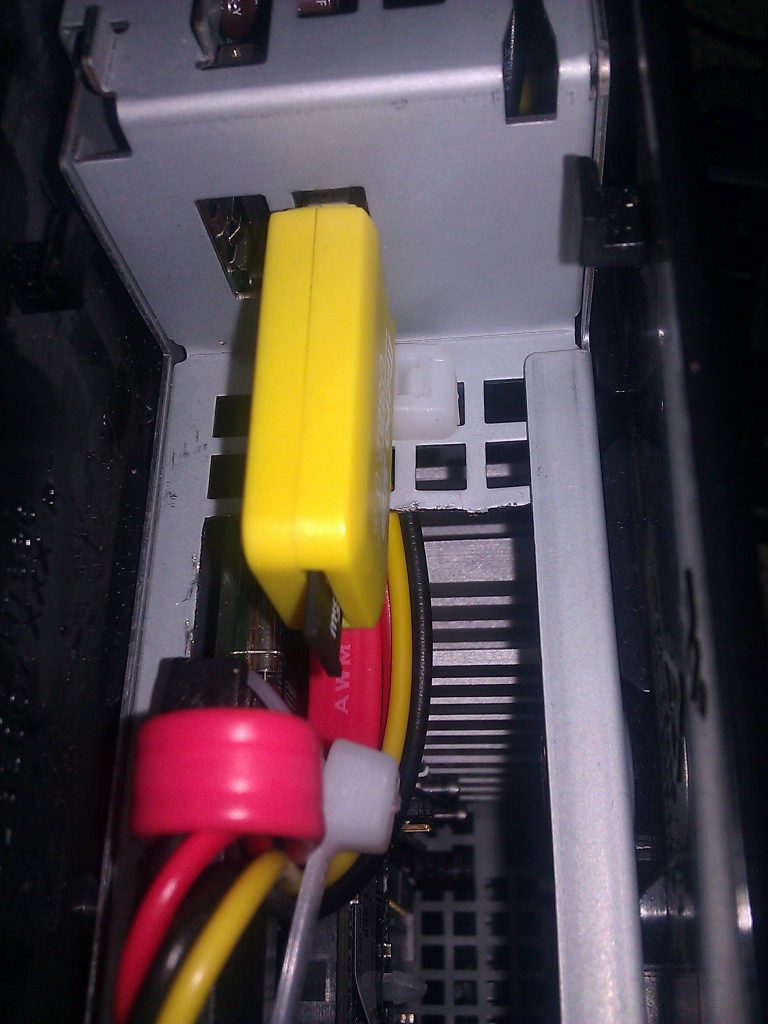
Now we only need to connect hard drive to the soldered socket. I got 30cm sata 15+7 male to female extension cable, which will be just perfect for the job. It can easily be sourced off ebay or aliexpress or any of electronics selling websites. I used some cable ties to secure the hard drive cables in place. I also had to remove some plastic bits as the plastic cover would not slide into the holes where the hard drive is mounted now.


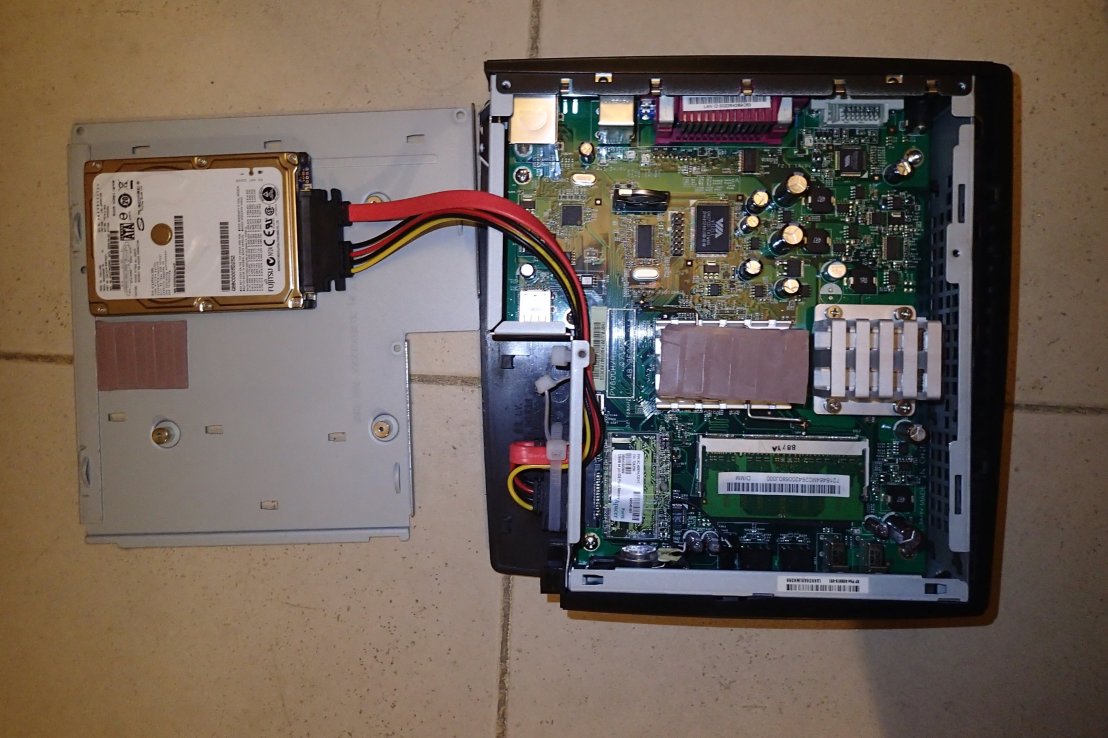
That is the hardware part done. No signs of tampering from outside :-).
Next is the software part. I initially hoped to use the internal 128MB flash as an operating system storage, but after trying OpenWRT and Voyage Linux (which worked fine!), I decided I needed some I can manage from any device in my home network over the web interface. I decided to try to get Nas4Free (http://www.nas4free.org/) working on the device. I did not want to put operating system on the data drive and the internal flash storage proved to be too small for the embedded install. Nas4Free minimal storage for that is 2GB. There are few options here. I could use replace internal flash for 2GB one with 2GB Compact Flash card with an CF to PATA adapter, but I had it installed into another thin client running my print server. Another option was running Nas4Free from usb drive. It can run “live” off usb drive, and it only needs about 1GB for the live media! As I did not have any USB thumb drive at hand, I got an 1GB microSD card and USB card reader. I put an image for x86 system (can be downloaded here) onto microSD card and put it into USB reader. I used hidden usb port of the thin client for my card reader.
I had to change BIOS setting to boot from USB first so it can boot from attached card reader. For the initial configuration I connected the keyboard and monitor to thin client. It is not really necessary as the initial boot sets the IP address for 192.168.1.250 and you can access and configure all functions (includung IP address) from within its web interface. It took almost 6 minutes to boot (my card reader is pretty slow), but hey!, this is going to be always on system and it will boot very rarely. I setup static IP address within my subnet, but outside my network DHCP range, and tried to log in over web interface.


I will cover the NAS share configuratio in another part. I have to say that after some tweaks, it works pretty well. I get about 20MB/s to 25MB/s transfer speeds to and from samba share on the little HP T5540 NAS. I consider it pretty decent speed for an old thin client device! Another thing worth to mention is that running Nas4Free “live” kept its configuration over reboots, but it is anyway good to have it backed up somewhere after setting it all up.

nice !
LikeLike
Interesting mod. But you have low reading speed.
I have an almost similar model, the HP T5565, (it has allready a sata port), with a 2.5 inch hdd (connected via sata port), screwed inside the case, exactly like in your pictures.
I installed a lite version of windows xp sp2 and I copy through gigabit network, from windows shared folder, simple sharing, no passwords, with 80 MB/s ( the hdd is ntfs formated, 2TB, sata 3, 5400 rpm).
You should try it, becouse windows xp is more light for the proccesor.
PS: I installed only the gigabit ethernet driver – search google for: gigabit bcm57780
LikeLike
I’ve been considering windows, but the embedded option of nas4free (now XigmaNAS) took my heart. The advantage of running it embedded is that there is no writes to usb/sd card during operation – it only saves configuration changes, besides will windows fit onto 1gb usb?
LikeLike
I bet if you got the version of xp embedded that came on ours it will fit in 1gb. I don’t know if HP has the image on their site for download though.
LikeLike
I have a similar unit–the t5630. Neat project! We use ours connected to our HD tv to monitor our business security cameras while at home (the camera web viewer uses a proprietary ie plugin, but works great on the t5630). Our t5630 has 1gb of ram, so I bet you can upgrade your 512 to 1gb for faster performance.
According to the information at parkytowers (such a great site!), the chipset can support up to 4gb, so I’m wondering if a 2gb even 4gb module might work. Thoughts?
LikeLike
Yeah! They are very versatile devices. I remember using one for ftp server storing security camera stills sent by camera every 5 minutes for a later timelapse video creation… it was there for three months with not a single failure!
LikeLike
Oh yeah, thin clients are great ftp servers. We use a pair of neoware ones and typsoft’s ftp server to be the repository for our network scanners. Works very well.
LikeLike